How do I export a logo PNG that works in dark mode?
Export the SVG with transparency, then place the downloaded PNG on both the light and dark backgrounds where it will actually appear. If either version loses contrast, change the logo artwork and export separate light- and dark-surface variants, or use an intentional solid background. Transparency alone cannot make a fixed-color mark adapt to a theme.
Convert an SVG to PNGTest the actual pixels on two surfaces
A dark mark may look clear on a white preview but disappear on a dark header. A white mark can do the opposite. The illustration below uses the same simple symbol on two surfaces to show why checking only a checkerboard preview misses the destination context. These are original sample marks, not a brand identity.
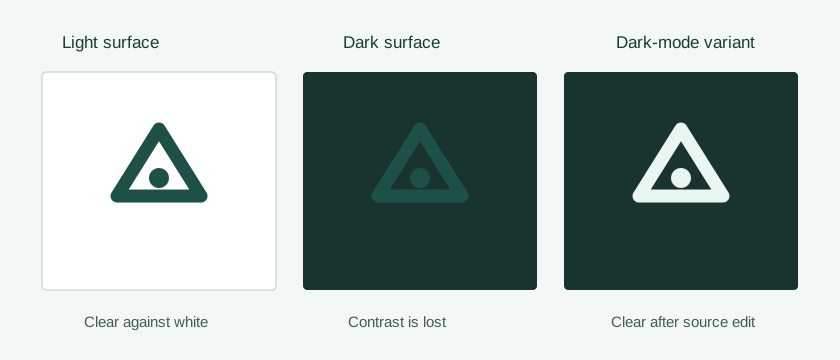
Place the downloaded PNG in a mockup of the real header, email, slide, or app. Compare the mark, any wordmark, and its edges against both surfaces. If a subtle border is essential to distinguish it, add that border to the source artwork rather than assuming the destination will provide one.
Choose a deliberate export strategy
| Destination | Export choice | Check |
|---|---|---|
| Background changes with theme | Two transparent PNG variants, with the appropriate one selected by the destination | Test each on its matching background and confirm the destination switches assets |
| Background always known | One transparent PNG whose logo has sufficient contrast on that surface | Inspect it at the real display size |
| Destination cannot switch assets | One logo in an intentional solid-color tile, if the design permits | Check the tile's edge and surrounding layout in both themes |
A single transparent PNG contains fixed pixels. It does not inherit CSS currentColor or recolor itself when the page changes theme. Keep the editable SVG and create clear filenames such as logo-on-light.png and logo-on-dark.png; the names describe the surface, not the logo's own color.
Export and verify without stretching
- Open the SVG and inspect its bounds. Check that no off-canvas element creates excessive empty space.
- Choose a custom output width suited to the destination, keep the aspect ratio locked, and leave the background on Transparent for a cutout logo. For a fixed tile, choose Custom and select the intended background color.
- Download the PNG. Reopen the file to confirm its dimensions and transparent corners or deliberate tile color.
- Composite the actual file over light and dark destination colors at the size it will appear. If contrast fails, revise the SVG, export a second variant, and repeat the check.
Do not enlarge a small PNG to make a second variant. Change the vector source and export again. For a website that switches by theme, the page or stylesheet must choose the correct image; the conversion step alone cannot perform that switch.
FAQ
Will a transparent PNG automatically adapt to dark mode?
No. Transparency reveals the background but leaves the logo's colored pixels unchanged. Use a suitable mark for both surfaces or switch between two exported variants.
Can I solve a white logo on white by adding a shadow after export?
You can add a deliberate outline or shadow in the SVG source and test it on both backgrounds. Avoid relying on a preview effect that is not part of the downloaded file.
Should I export on white instead of transparent?
Use a white tile only if a visible white rectangle is acceptable in every destination theme. If the mark needs to sit directly on a changing background, make and test transparent variants.